If you’re looking for a short hike in Banff to complement your visit to Moraine Lake, then Consolation Lakes Trail is perfect. This easy trail starts at the Moraine Lake parking lot and finishes at two stunning lakes surrounded by mountain peaks.
Unlike other trails that leave from Moraine Lake such as the Larch Valley Hike, Consolation Lakes Trail involves very little uphill hiking, and sometimes, that’s just how I like it!
The best part though? Your adventure doesn’t have to stop at the lakes if you don’t want it to. In fact, if you’re feeling adventurous you can jump onto another trail called Panorama Ridge that leaves from Consolation Lakes, turning this short, easy hike, into an epic adventure.
In this blog, I’ll share everything you need to know about hiking Consolation Lakes Trail including tips to ensure you have the best time possible!
Consolation Lakes Trail Overview
Distance: 5.8 kilometers/3.6 miles return
Elevation gain: 65 meters/213 feet
Difficulty: Easy
Time needed: 2-3 hours
Type of trail: Out and back
Consolation Lakes Trail is a short hike that begins near the famous Rockpile at Moraine Lake. From here it’s an easy 2.9-kilometer/1.8-mile hike one way.
The entire hike has slight inclines and declines on the way to the lakes but is mostly up on the way there. The trail is large and well maintained making it accessible for almost anyone.
It takes around 1 hour to hike each way and 3 hours is enough time to complete the hike with time enjoying the lakes. Although the Consolation Lakes hike does get busy throughout the day, in the late afternoon you can enjoy the trail without the crowds.
Overall, it’s a great short hike the whole family can enjoy and one of the best activities to do at Moraine Lake!
Related Read: Another great short hike perfect for the whole family is Grassi Lakes Trail in Canmore. It’s a hike that you can do in Canmore in the winter as well as the summer months!
Consolation Lakes FAQs

What to Pack to Hike to Consolation Lakes

Bear spray – Bears are common in the valley where the Consolation Lakes hike is. It is highly recommended to carry bear spray with you no matter how busy the trail is.
Hiking poles – If you have bad knees then bringing hiking poles is a great idea. Also, the trail is wide enough for them to be used properly.
Snacks – It’s only a 3-hour return hike but you still may want to bring food! Bailey and I always get hungry during hikes!
Runners or hiking boots – Hiking boots are not required on the Consolation Lakes hike so you can bring along runners if you want to. Just be aware that parts of the trail can get a little muddy.
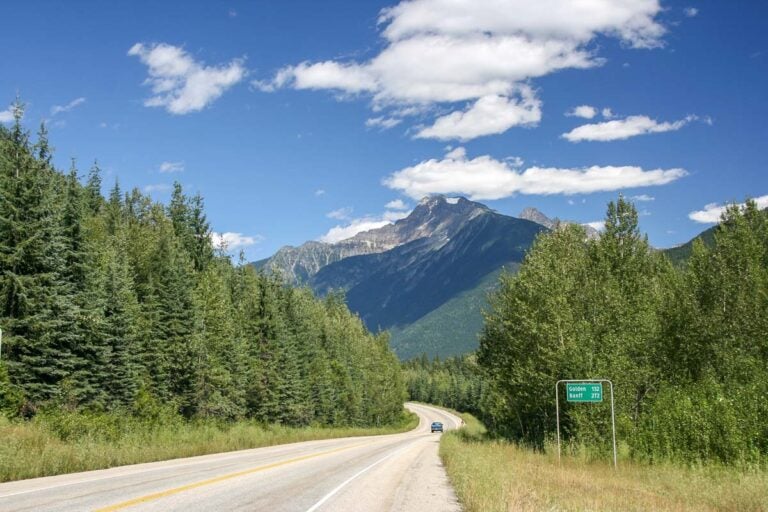
Related read: Moraine Lake is one of the most iconic places to stop on the Icefields Parkway (a very scenic stretch of road that runs from Jasper to Banff.) Read our blogs to plan your own epic road trip!
Parking and the Consolation Lakes Trailhead

Since Consolation Lakes Trail starts from the Moraine Lake parking lot, the hardest part about the trail is just getting to the start since parking is no longer allowed in the Moraine Lake parking lot. Annoying, I know, but Moraine Lake is the most famous lake in Canada, so it’s worth the hassle. Parking was nearly impossible before the access road closed, so this isn’t a huge loss.
If you want to arrive in the morning, you do need to plan ahead to get to Moraine Lake. The first buses and shuttles to Moraine Lake typically leave around 6:30 am, so getting on one of those is your best bet. You can read more about this new Moraine Lake Sunrise Shuttle here.
For more details on parking alternatives, you can read about the Park and Ride Shuttle, ROAM Transit Bus, the hop-on-hop-off bus, or the privately-operated shuttle below. Or read our guide to alternatives for parking at Moraine Lake. It details everything you need to know about the various ways you can get to the lake since as of 2023 the access road is closed to all personal vehicles and only available for organized tours to Moraine Lake, buses/shuttles, and those with disability parking permits.
After reading that guide, you should be prepared to try and visit Moraine Lake.
Note: The road to the parking lot at Moraine Lake that all the shuttles and buses use is only open during the summer months (typically from the beginning of June until mid-October depending on the weather).
Park and Ride Shuttle

The Park and Ride shuttle now departs from the Lake Louise Ski Resort parking lot. During previous years, it departed from an overflow parking lot located 6 kilometers (3.7 miles) east of Lake Louise Village on the road between Lake Lousie and Banff.
These shuttles are cheap (adults $8 CAD; seniors, $4 CAD, and youth 17 and under are free) and start running as early as 6:30 am. You can find all the info on the Banff Lake Louise website or the Parks Canada website.
The only downside is that the shuttle MUST BE BOOKED IN ADVANCE. And unfortunately, this means that it is often fully booked.
One insider tip: 60% of the spaces on the shuttle are saved for “last-minute bookings”. These spaces open exactly two days before at 8 am. For example, if you want to visit Moraine Lake on Thursday, be online on the reservation system at 8 am on the Tuesday before. This way, you might still have a chance at getting a reservation.
Another thing to note is that even if you want to only visit Moraine Lake, book the shuttle to Lake Louise if that’s all that is available. The reason is that with your reservation you’ll get free access to the Lake Louise Connector Shuttle. The Lake Louise Connector shuttle runs between Lake Louise and Moraine Lake all day and is available to people who have a Park and Ride reservation or ROAM Superpass.
If you missed out on the shuttle bookings, try this hop-on-hop-off bus from Banff. It is more expensive but you’ll also visit a few other iconic attractions such as Johnston Canyon!
ROAM Transit (Public Bus)

ROAM Transit is the public bus system. You can actually buy a bus pass with ROAM that will get you to both Lake Louise and Moraine Lake from either Banff or Canmore.
You must buy the ROAM “Superpass”, this pass is $25 CAD and includes your roundtrip transport from Canmore or Banff to Lake Louise Lakefront. Once here, you will get off the ROAM bus and change onto the Parks Canada Lake Connector Shuttle. Show your Superpass to the driver and you will get a free ride to Moraine Lake! The Connector Shuttle leaves every 20 minutes, so it’s very easy to use.
This is great because it means that for $25 CAD you can visit Lake Louise AND Moraine Lake in one day!
It is highly recommended that you book your ROAM Superpass in advance during the summer months.
For more detailed info read our blog about parking alternatives at Moraine Lake and shuttle options!
Hop-on-hop-off bus
The first departure time for the hop-on-hop-off bus is at 7:45 am from Banff at Moose Hotel and Suites on Banff Avenue. One of the following stops will be Moraine Lake.
The stops are very well organized so you will be able to plan out how much time you want to spend at Consolation Lakes based on what times the bus will come back around to the Moraine Lake parking lot before heading back to Banff.
Tickets for the entire day are $80 CAD and even though it seems like a big upfront cost if you start early you can make use of hopping on and off at several other locations too!
Book the (new!) privately-operated shuttle

The Moraine Lake Bus Company has just started offering these shuttles to Moraine Lake from Lake Louise. This option is for transport only – so no tour guide. That does make it a lot more affordable than regular tours as this shuttle starts at only $35 CAD per adult.
We took this shuttle last year (read our review here) and something we loved about it is that it offers early morning departures at both 4 am and 5 am, which means seeing the sunrise at Moraine Lake! But even if you aren’t an early riser, this shuttle is super convenient because your spot on the shuttle is booked, meaning no waiting around in long lines like you would with the Parks Canada shuttles. We saw the HUGE lines for the Parks Canada shuttles on our way back and it was so nice to breeze by and go to our guaranteed seat on the Moraine Lake Bus company vehicle.
When you book the shuttle, you can also choose to add on a quick hour-long stop at Lake Louise Lakefront. This is the perfect choice for anybody who also wants to check out Lake Louise for a few photo ops without the stress of trying to get parking.
One thing to note about this shuttle is that it departs from Lake Louise (either Lake Louise Village or the Lake Louise Gondola, depending on the departure time that you book). So, you will have to get yourself to the meeting point.
We expect this shuttle to be very popular this year (especially the sunrise shuttle departures), so we recommend booking online here to secure your spot.
Related Read: Moraine Lake is one of the places to visit on our most Instagrammable places to visit in Banff blog. Find out what the rest are!
Hiking the Trail to Consolation Lakes


From the parking lot at Moraine Lake, the trail starts just near the toilets on the same trail that leads to the Rockpile. Start here and continue hiking until you cross a small bridge, after this, the trail turns to steps until you reach a Y in the path. Consolation Lakes Trail starts on the left and is marked by a large sign warning of bears!
This sign will either recommend groups of 4 adults or more OR it will be mandatory. If it is mandatory, you can be fined for hiking in smaller groups as this means bears are in the area. If you’re in a smaller group, just wait for other hikers and join them!
The trail begins with a short downhill hike into the valley from the Rockpile. Here, you’ll be able to see the start of the unofficial hike up to the Tower of Babel.
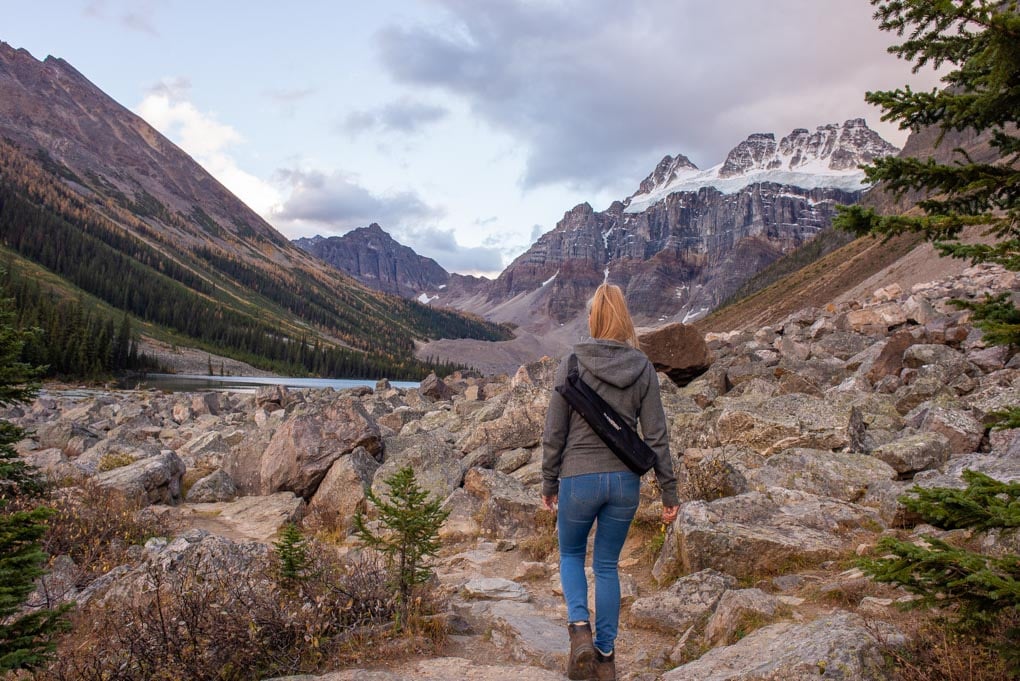
Continuing on, we entered a forest area that eventually follows a small stream all the way to the lakes. This part of the trail has a gradual climb but overall feels flat.
As you hike this part of the trail you can stop and check out the stream which in parts, forms small waterfalls. Bailey and I didn’t stop because we wanted to make it to the lakes before sunset. After around 45 minutes of a fast-paced walk, we arrived at the first lake.
From here the views are magnificent. To the left, you can see Panorama Peak, and to the right, Bident and Quadra Mountain sit covered in snow. There are bears who live on the hills in this area so keep a lookout as you might spot one.
You can choose to stay at the first lake and then turn around or hike on to the second.
Exploring Consolation Lakes

After enjoying the views of the first lake you can now hike onto the second if you choose to. If you’re traveling with small kids it could be wise to turn around now. This section takes around 30 minutes of bouldering and hiking over rocks. This may be a little challenging for young kids.
I found the first lake the most beautiful as the panoramic views are breathtaking. So, if you do choose to turn around you can do so knowing you’ve seen the most beautiful part of Consolation Lakes.
After reaching the second lake, you’ve made it to the end of the Consolation Lakes Trail. If you want to keep hiking, you’ll need to backtrack a little to the first lake and then jump onto the Panorama Ridge hiking trail.
Continue on to Panorama Ridge

Distance: 4 kilometers/2.5 miles return to the top
Elevation gain: 900 meters/2953 feet
Difficulty: Hard
Time needed: 4 hours from Consolation Lakes
Type of trail: Out and back
A popular add-on to Consolation Lakes Trail is Panorama Ridge. I personally have not done this trail, however, from the photos I’ve seen it looks amazing! To start the trail you’ll need to cross the stream at Consolation Lakes.
It is recommended to do it at the first lake where you can use the large rocks and trees to cross. Despite this, you could still get wet – so be prepared.
Once across you will need to do a bit of bushwhacking to get to the trail that’s really just a gully. You can easily find the trail/gully people use by scanning the mountain for a trail (pictured above.)
This trail is more of a scramble to the top and once you’re on the trail just keep climbing till you reach the ridgeline. From here you can either hike back down or continue along the ridge for a little while before returning.
There isn’t much info online about hiking Panorama Ridge however, this blog, this blog, and this 10 Adventures guide do outline lots of things you need to know before you go. This trail should only be attempted by experienced hikers with scrambling experience.
If you’re looking for a beginner’s scramble trail, then Heart Mountain Horseshoe Loop is a good hike located just outside of Canmore.
Essential Info to Know about Consolation Lakes Trail
Mandatory hiking groups
If the signs recommend hiking in groups of four or more it’s best to follow them. For one, you can be fined but the main reason is that the risk of a bear encounter is much more likely. As always, carry bear spray, know how to use it, and make lots of noise to let bears know you are coming.
You can only access the trailhead in Summer
The road to the Moraine Lake parking lot closes in the winter due to avalanche risk, and this is where the trailhead is. So, hiking Consolation Lakes is one of those summer-only activities in Lake Louise.
You need a National Parks Pass
Consolation Lakes Trail is within Banff National Park so you do need a parks pass. This can be purchased online or at the entrance to Banff National Park on the highway. These passes cost $10.50 CAD per person per day or $21 CAD for an entire family/group.
Alternatively, they have yearly passes online that also cover families and are of great value. A year family pass for one car with up to seven people is only $145.25 CAD.
Other Things to do While You’re in Banff


Seeing the incredible lakes around Banff is just one of the many awesome things you can do in Alberta! To give you an idea of more places to explore, here are some of the other things you can do while you’re in Banff:
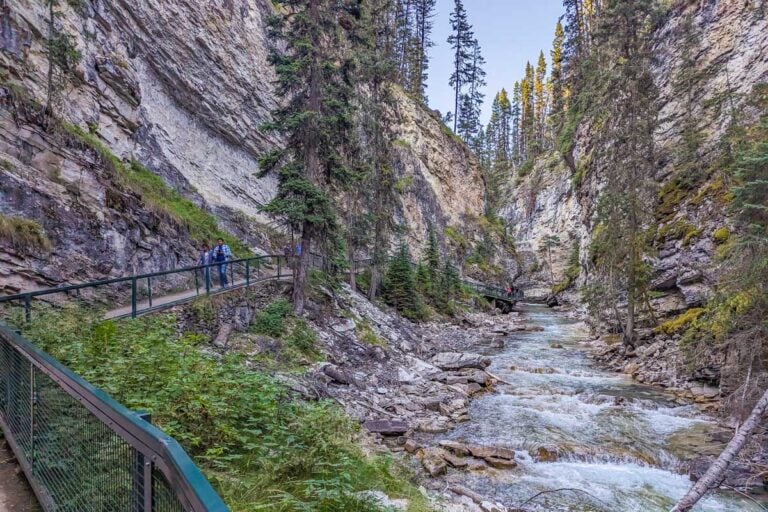
- Hike Johnston Canyon – There are tons of amazing hikes in and around Banff, but I especially loved hiking Johnston Canyon and seeing its spectacular waterfalls. You can drive to the trailhead on your own or book a tour. This e-bike and hiking tour is excellent for those who want to combine both activities. Or if you just want transport, take the hop-on-hop-off bus that stops here. If you visit Johnston Canyon in winter, this Icewalk tour will show you ice formations and frozen falls!
- Ride on a gondola – If you want the best vantage points around, take in one of the four gondolas around Banff! You’ll climb up high above the ground with tickets for the Banff Gondola, the Banff Sunshine Gondola, Lake Louise Gondola, or the Mt Norquay Chairlift.
- Look for wildlife – Banff is home to some pretty incredible wildlife. You might just spot elk, bears, deer, foxes, coyotes, bighorn sheep, and more! The best chance you have of seeing the most critters is on a wildlife tour in Banff. We really liked this small group tour where the guides tailor the itinerary to recent wildlife spottings and you get to see highlights of the national park along the way.
- Explore Banff town – While many nature-based activities are nearby, you shouldn’t neglect Banff town itself! Start your morning by visiting one of the cute local cafes, or grab patio drinks along Banff Avenue in the afternoon. To avoid traffic, check out the pedestrian-only Bear Street, with even more restaurants, cafes, and shops. And if that’s not enough, there’s also a Farmers Market every Wednesday in the summertime.
Where to Stay in Banff

If you’re exploring the lakes in Banff, it’ll require some time and driving. Your best option is to stay nearby! There are several areas you can stay in Banff National Park – each with its own pros and cons. However, the fan favorite is usually Banff town itself.
Banff has plenty of great hotels and is used to tourists. But since the selection can be overwhelming (and book up months in advance!), we’ve chosen some of our favorite options for each budget below:
Fairmont Banff Springs – $$$
The Fairmont Banff Springs is easily the most luxurious hotel in Banff. It’s not cheap, but the place is simply incredible – it seriously looks like a castle! Inside the hotel, you’ll find 11 restaurants, 14 shops, bowling, bars, a top-rated spa, a couple of pools, and so much more. If you’re visiting Banff on a honeymoon, then this should be the hotel you choose! Rooms here can start as high as $755 CAD, and you can check prices and room availability online here.
Banff Rocky Mountain Resort – $$
The Banff Rocky Mountain Resort has a swimming pool, hot tub, and gym, and all the rooms have kitchenettes or full kitchens. It’s the perfect place for families since it also offers two and three-bedroom units. The location is peaceful on Tunnel Mountain but yet only a 5-minute drive from Banff town. Rooms here start at $155 CAD and you can check availability and book online here.
Banff Inn – $$
The Banff Inn is the perfect mix of comfort and affordability. It has a budget-friendly price tag but also comes with lots of luxuries like a hot tub, steam room, and sauna, as well as a restaurant and bar. The hotel is located right on Banff Ave and all rooms are air-conditioned. A room here starts at $166 CAD but you should book the Banff Inn well in advance as this is one of the most popular hotels in Banff!
Samesun Banff Hostel – $
Samesun Banff Hostel is a great budget hostel with dorm rooms. It has everything you could need on-site including laundry, a restaurant and lounge, and a common area. It’s also perfect for those on a tight budget who want to stay in the heart of Banff town. This is only a backpacker place though, as there are no private rooms available. A bed here starts at $64 CAD, so for a great price and prime location, book your stay in advance on Hostelworld.com or Booking.com!
Parks Canada Pass Quick Info
If you plan on spending time in Canada’s national parks (including Banff, Jasper, Yoho, Mount Revelstoke, Glacier, Kootenay, and more) then you’re going to have to pay for a Parks Pass.
Single Daily Admission:
This type of pass is valid for one person for one day. It is ONLY the best value if you are traveling alone and only plan to visit a national park for a couple of days.
- Adult (ages 18-64) is $11 CAD
- Senior (65+) is $9.50 CAD
- Youth/Child (17 or younger) is FREE
Group Daily Admission:
If you’re traveling in a group or with family, you can buy a single-day admission for your entire vehicle (up to 7 people in one vehicle.)
- $22.00 CAD gets your entire vehicle entry for one full day
Parks Canada Discovery Pass
The “Discovery Pass” is what Parks Canada calls their year-long (365 days from the purchase date), multi-park entry pass. This pass will give 365 days of access to all participating national parks in Canada. This includes the most popular parks like Banff, Jasper, Yoho, Kootenay, Glacier, Mount Revelstoke, and so much more.
- Adult (age 18-64) – $75.25 CAD
- Senior (65+) – $64.50 CAD
- Group/Family (up to 7 people in one vehicle) – $151.25 CAD
Hot Tip: Although more expensive up front, if you plan on spending more than 7 days in different parks in Canada within a 12-month period, then the Discovery Pass is actually the better deal!
Parks Canada Passes can be bought online here or at one of the Visitor Centers or booths at the entrance to many national parks.
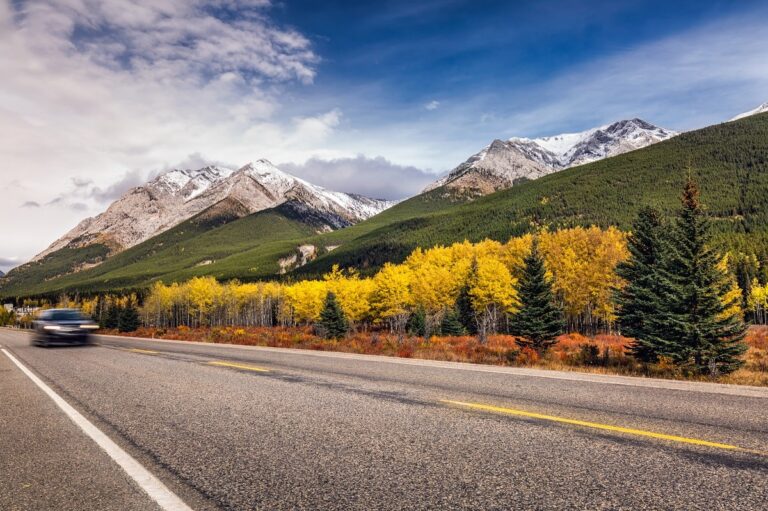
Renting a Car in Alberta

If you’re arriving in Alberta via plane then I can’t recommend getting a rental car enough! Canada is a large country and traveling between cities and even just getting out to some of the best places to visit in Alberta requires transport. Although you can use public transport, on some occasions, it means your trip will not only require more time but more planning.
Renting a car will definitely make exploring all of the fun things to see and do in Alberta easier.
Car rental in Canada isn’t super cheap, but it isn’t overly expensive either, especially if you get a budget car. The cheapest car with pickup and drop-off in different locations is around $100 CAD per day. The price does vary though depending on the time of year and the type of car that you rent. For car rentals, I use the website DiscoverCars.com. It’s a search engine with lots of deals with good customer service. In fact, I’ve used them all over the world including in Chile, New Zealand, and Australia. Read our honest review of Discover Cars here for more details!
Check availability and prices on Discover Cars here!
Another popular option is to rent a campervan or motorhome (only for the brave in winter). Using Motorhome Republic you can search hundreds of deals across multiple companies to pick a great vehicle and the cheapest price. Having a motorhome is a stunning way to see Canada, and you can often camp for free or very cheap in the most beautiful places imaginable! Check out my review of Motorhome Republic here for tips before you book.
And if you’re planning to camp but don’t want to splurge on a huge RV, we highly recommend Smile Campervans. Based in Calgary, this local company provides compact campervans fully equipped with everything you need for a comfortable and affordable road trip adventure!
In fact, Smile Campervans has actually given us a special discount code for our readers! Use the code DESTINATIONLESSTRAVEL at checkout to get 5% off your campervan rental! Click here to browse availability, prices, and book with our discount code!
AIRALO e-SIM Up To 15% Off With Code “DTRAVEL15”
What’s an eSIM?
An eSIM is a digital version of a SIM card. Instead of buying a little plastic chip and swapping it into your phone, you just download it. It connects your phone to a local network in whatever country you’re visiting — no stores, no waiting, and no fiddling with tiny cards.
In simple terms, it’s the easiest way to get data and stay connected while traveling.
We’ve tested a bunch of eSIMs over the years, and after a few frustrating experiences, we’ve found our favorite — Airalo. It’s fast, reliable, and incredibly easy to use. You can set it up in minutes (even my mom managed it solo on her first try!), and the prices are some of the best out there.
💡 Bonus: We’ve got an exclusive 15% discount for our readers. Use the codes:
Thanks for reading!

Consolation Lakes Trail at Moraine Lake isn’t one of the best, but, considering it’s much easier than most hikes in the area, it’s a great trail for the everyday traveler. For me, it was a brisk walk and not really much of a “hike” per se. This meant we could hike the Larch Valley in the morning and hike Consolation Lakes in the afternoon.
Overall, I loved the views at the lakes, and those mountains, just wow!
Thanks so much for reading! I really hope this blog has helped plan your hike to Consolation Lakes. If you did find the blog helpful then you’ll love our other Canada blogs or the articles listed below!