
The Ha Ling Peak hike is easily one of the best hikes in Canmore, Alberta. In fact, I’d say it IS the best! There, I said it – and I know that’s a big claim to make.
I mean, Canmore and the stunning Kananaskis region offer many amazing hikes. However, after hiking almost all of the trails myself (and grabbing plenty of photos along the way!), I feel confident in making the statement that Ha Ling Peak is, in fact, the best.
So if you’re up for a challenge with the most rewarding views, then it’s time to lace up your boots and conquer the Ha Ling Peak hiking trail. I’ve written this blog to help you prepare with all of the essential info to know before you go, so you can have the best time out there on the trail!
Ha Ling Peak Hike Overview
Distance: 3.9 kilometers (2.4 miles) one-way to the summit, 7.8 kilometers (4.8 miles) total return
Elevation gain: 810 meters (2,657 feet)
Difficulty: Moderate
Time needed: 3-5 hours
Type of Trail: Out and back
From 1032 meters (3385 feet) above Canmore, the views from the summit of Ha Ling Peak are unbelievable. And the best part? For a view like this, you only have to hike 800 meters (2624 feet) in elevation thanks to the road that drives you partway up the mountain to the Ha Ling Peak trailhead.
Sure, this elevation gain doesn’t make it an easy hike like others such as the Lake Agnes Tea House hike near Lake Louise. But that said, it’s completely doable, especially because the trail is well-maintained and even has stairs in some places for a quick incline.
Note: A Kananaskis Conservation Pass is now required to explore the Kananaskis region. These passes can be bought at the Kananaskis Visitor Center or online in advance and cost $16 CAD per vehicle per day or $95 CAD per year (for two vehicles).
Starting it off with Switchbacks
This hike does not ease you into it. In fact, right from the beginning, the incline starts. Prepare yourself for switchbacks through the forest for an hour or so.
I’m not going to sugarcoat it – this part really is a challenge. It’s all uphill and since it’s through the forest, there are no views at all. If you’re like me, at this stage you’ll be wondering why the heck you signed up for this!
That is, until you reach the first viewpoint…
The First Viewpoint


This viewpoint is on the edge of a cliff. It is a fairly new development on the Ha Ling Peak trail and marks roughly the halfway point to the saddle. From the viewpoint, you’ll have views back over the valley where you parked, Rundle Mountain, and Goat’s Creek.
You can really get some spectacular photos from here.
In all honesty, if by this point you are really tired you can end the hike here. The views from this first viewpoint are amazing, and the next half of the Ha Ling Peak hike is even harder than the first half – don’t say I didn’t warn you!
Related Read: If you want some other great photo locations in the area, check out our blog about the most Instagrammable places in Banff National Park!
Staircase to the Ha Ling Saddle

After the viewpoint, it is back through the forest for a short while before you reach the tree line. Where the trees begin to end, the stairs begin.
That’s right, Alberta Parks has put a fair bit of money into Ha Ling Peak Trail, and it really shows with the massive, fancy staircases installed on the edge of the mountain. These staircases may make your legs burn, but they allow you to move up the mountain quickly and easily without worrying about the rocky shale.
There are just over 400 steps across a couple of staircases. Once at the top of the stairs, you have reached the saddle – congrats!
Now, you must decide whether to hike to Ha Ling Peak Summit or not.
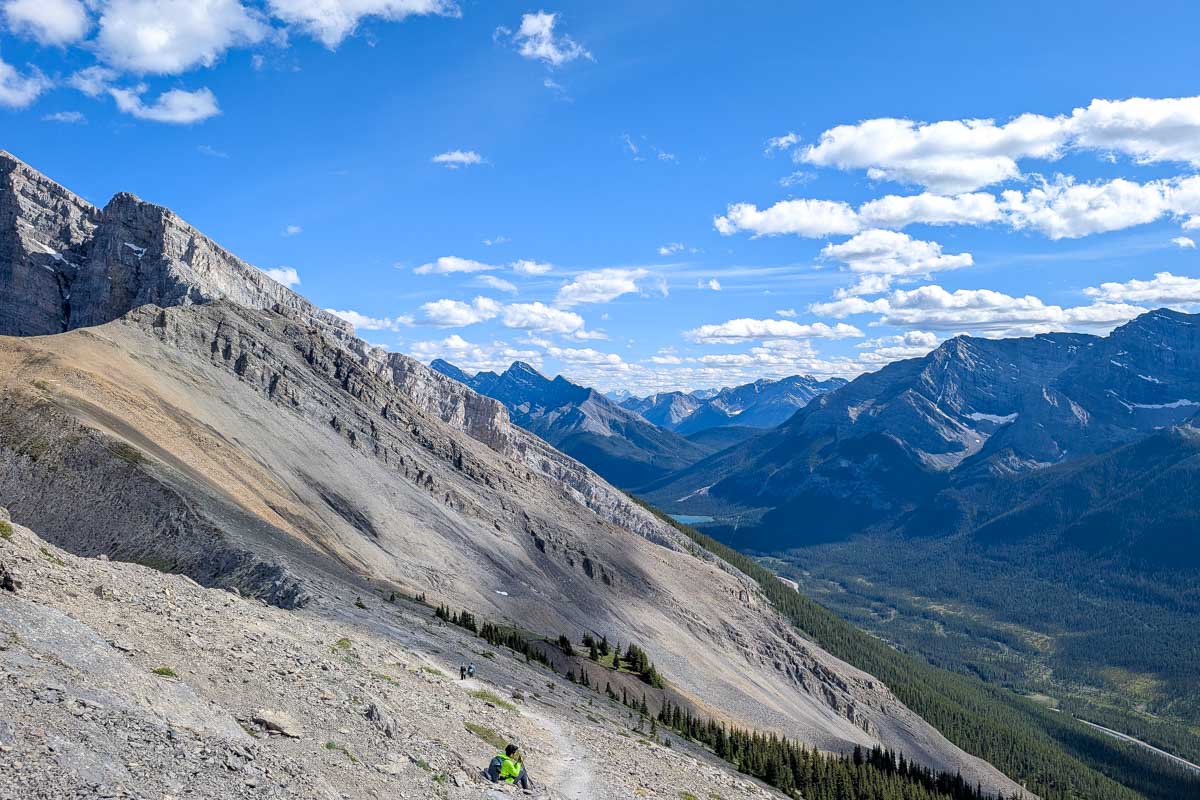
Scrambling to the Summit
When I climbed Ha Ling Peak for the first time, I had every intention of making it all the way to the summit. But by the time I made it to the saddle, I started to question that plan.
It was super windy and the trail was just shale rocks that made keeping my footing difficult. Not to mention the fact that I was already tired. I was content just staying at the saddle and enjoying the views from there.
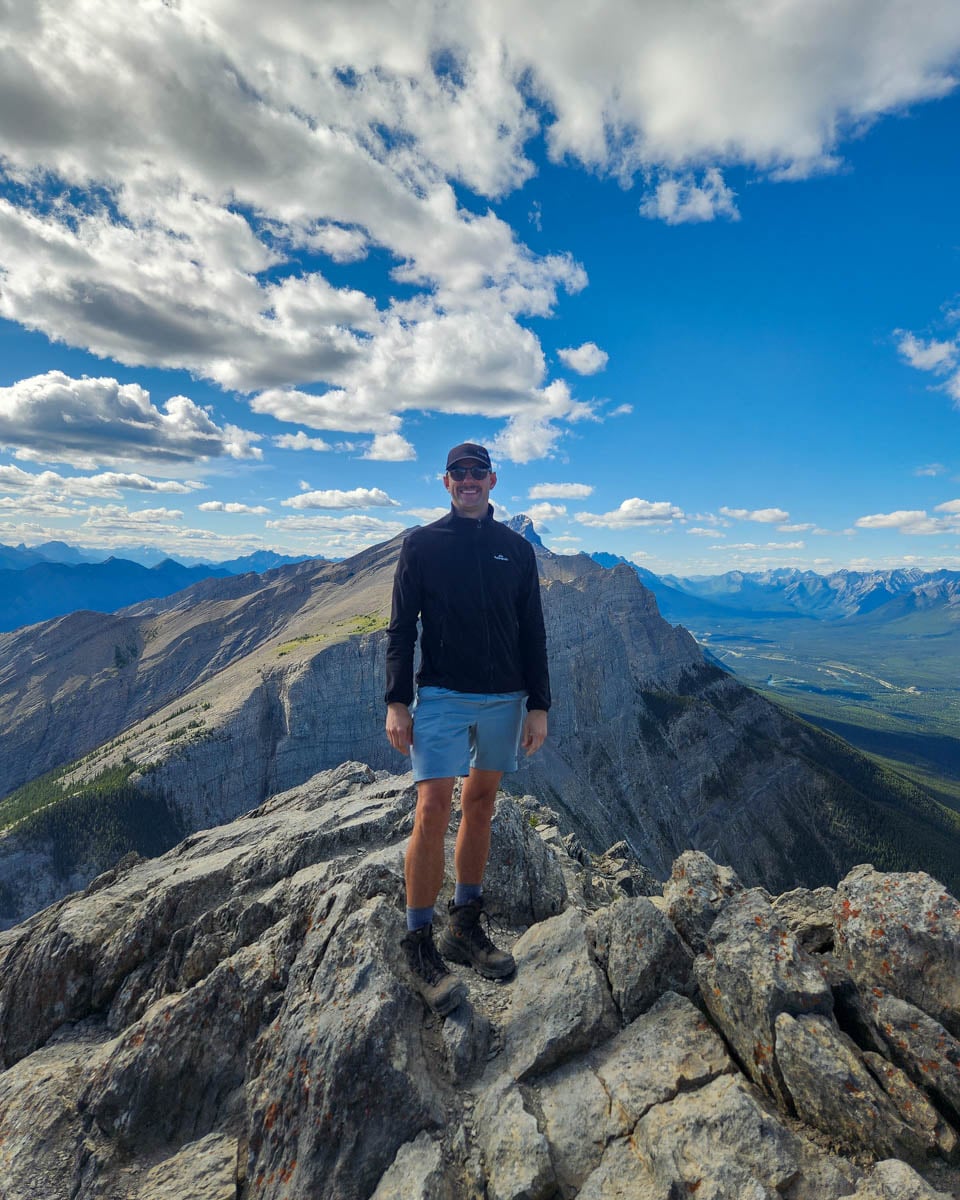
But Daniel wasn’t having it. He wanted to be able to say he summitted Ha Ling Peak! So we continued on.
Carefully we scrambled across rocks, taking it one step at a time. The wind was howling and there were clouds everywhere, and then it started to snow! It was June, and we did not expect such crazy weather – I was freezing!
For this reason, make sure you bring another layer, plus this will come in handy once at the top so you can actually hang out for a little while and enjoy the views without getting chilled to the bone.
The climb from the saddle to the summit is the most technical part. The rocks move beneath your feet, but if you’re careful, it is perfectly safe. This last climb gains about 100 meters (328 feet) over about 0.5 kilometers (0.3 miles) so it is also steep.
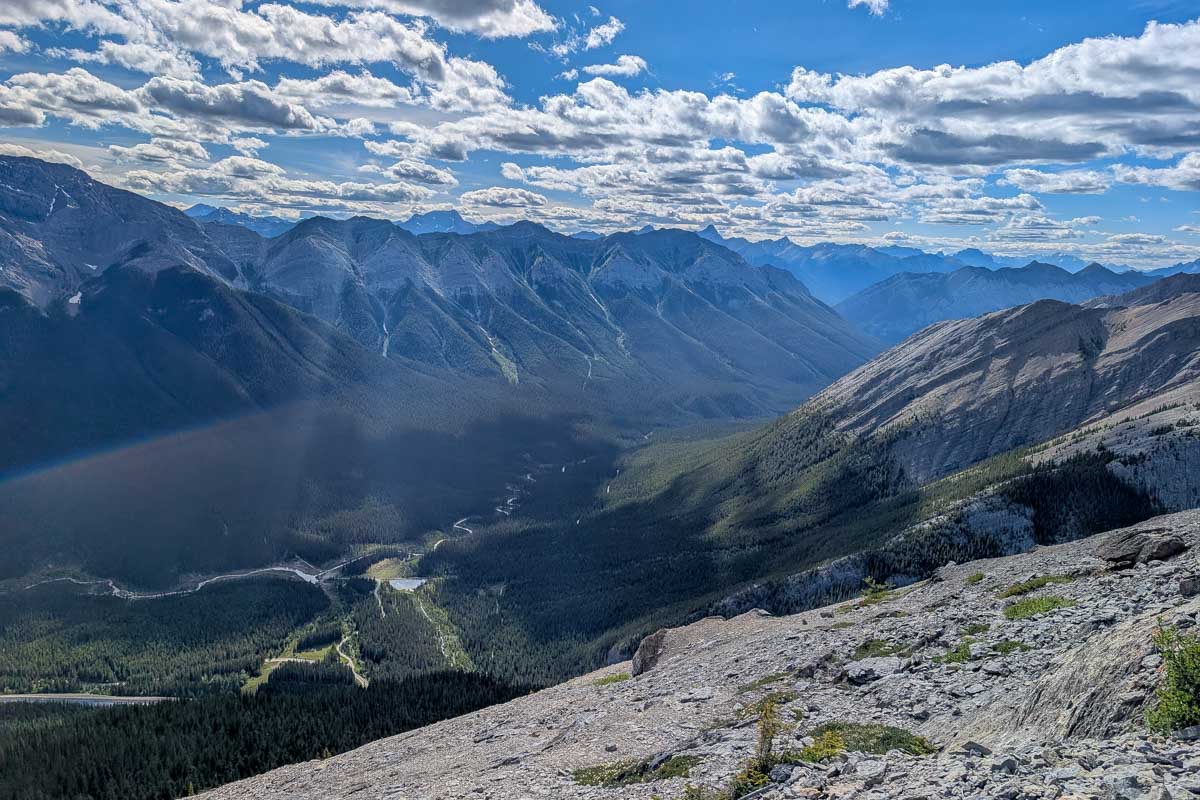
If the weather isn’t great, then I wouldn’t recommend heading to the summit. The views from the saddle are virtually the same as the summit anyway, so it might not be worth the effort or risk.
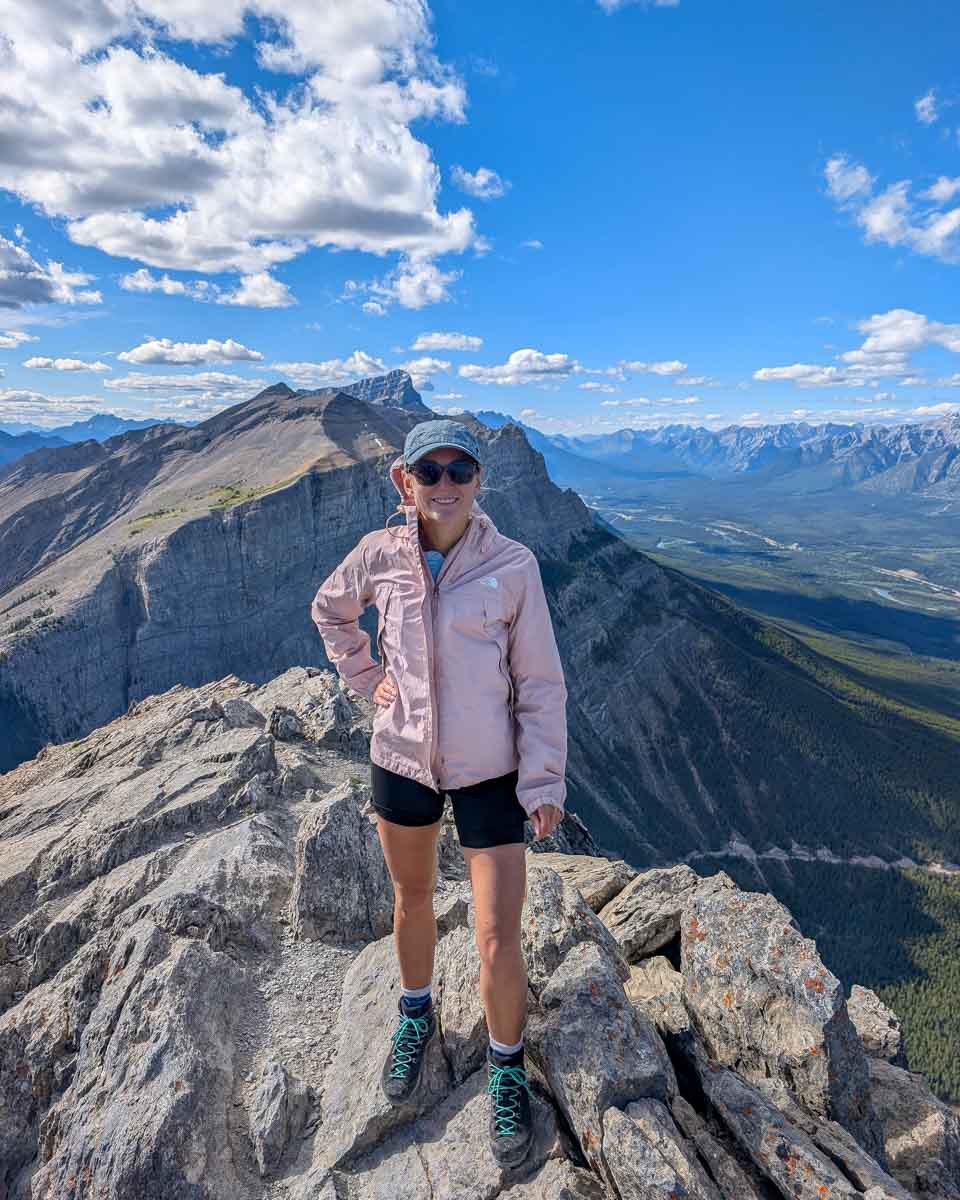
No matter if you make it to the saddle or summit, the views are crazy! Just pray you have a clear day, as I have also hiked Ha Ling Peak when I couldn’t see a single thing thanks to a ton of clouds (you can tell by the two sets of photos I’ve used!).
Related Read: Reward yourself after the hikes with a hot coffee from one of the best cafes in Canmore!
Bonus Hike: Miner’s Peak

If you want a little bit of a different (and easier) hike than to the Ha Ling Peak summit, you can actually choose to visit Miner’s Peak instead! The saddle of Ha Ling Peak Trail connects to both Ha Ling Peak and Miners Peak – Ha Ling to the left, and Miner’s to the right as you’re walking up.
Miner’s Peak is closer and less of a climb than Ha Ling. It’s often a lot less busy, which in the summer months, is an important factor to consider.
If you want to hike Miner’s Peak, walk the Ha Ling Peak Trail all the way to the top of the stairs when you reach the saddle. Follow the trail to the right and make your way up to the peak in front of you (that’s Miner’s Peak).
From the top of Miner’s Peak, you’ll have similar views to those from Ha Ling Peak. The main difference is that you’ll also have views of Ha Ling Peak itself (like pictured above.)
It’s a great alternative to the Ha Ling summit!
A Quick Descent

The one good thing about the Ha Ling Peak hike being so steep is that the way down is quick and easy! Literally, it’ll take less than half the time to get back down as it did on the way up!
You walk the same trail on the way down as the way up.
Ha Ling Peak FAQs

What to Pack to Hike Ha Ling Peak

Water, and lots of it – There is nowhere to fill your bottle along the Ha Ling Peak trail. The trail is steep, and you’ll want water and lots of it! I’d pack a bare minimum of 1.5 liters per person.
Windbreaker – The weather might be beautiful in Canmore, but up on Ha Ling Peak (especially from the saddle to the summit) it can be very windy. Don’t make the same mistake as me, and be prepared for windy weather!
Warm layers – As I said, it is much colder up on Ha Ling Peak than it is in Canmore. Warmer layers, a hat, and even gloves would come in useful.
Hiking poles – I love using hiking poles! On steep hikes like Ha Ling Peak, they are especially useful. Not only do they take the pressure off your knees, but they also provide stability, which is needed on the last scramble from the saddle to the summit.
Bear spray – Bears aren’t necessarily frequent on Ha Ling Peak trail, but it is bear country, and it is possible to run into one. Always carry bear spray when hiking in the Rockies, and make a lot of noise!
Parking and the Ha Ling Peak Trailhead

There is a large car parking lot at the Ha Ling Peak trailhead, officially called the Goat Creek Day Use Area. This parking lot is located along Smith Dorrien Road (Highway 742), a road that winds its way up from Canmore, past the Nordic Centre and the Grassi Lakes trailhead.
Parking is free and, from Canmore, it takes about 10 minutes to drive to the start of Ha Ling Peak Trail from downtown.
Although the parking lot at Ha Ling Peak is large, it is rumored to fill up on occasion. I am usually an early riser when it comes to hikes, so I’ve personally never seen it full. There are also two washrooms here if you fancy using them before/after your hike!
With that said, the peak times to hike Ha Ling Peak are in the summer months of July and August on the weekends between 10 am and noon. To avoid not finding a parking spot, consider leaving earlier in the day or later in the afternoon for a beautiful sunset hike.
The parking lot is located across the road from the Ha Ling Peak trailhead. So once you’re parked, you need to cross Smith Dorrien Road, then go over a concrete bridge and walk up the gravel road. After about 50 meters (164 ft), you’ll see signs and will know you’re at the start of Ha Ling Peak Trail.
Essential Info for Hiking Ha Ling Peak

Check the weather forecast
Hiking to the summit can be challenging and somewhat dangerous in really bad weather conditions, including wind. Also, if it is cloudy, you might get all the way to the top and not see anything at all. We had to hike the trail twice to finally get the views we wanted.
Pack the right gear
Warm clothing is essential even in the summer, think lots of layers, a windbreaker, gloves, and a beanie. In the winter, there will be a need for crampons or snowshoes. Hiking poles will also come in handy on a steep hike such as Ha Ling Peak.
Be prepared for a workout
Although a popular hike, it is a challenging, steep hike. It’s much, much harder than Grassi Lakes but easier than the Heart Horseshoe Loop Track.
The trail doesn’t start at the parking lot
The trail starts on the other side of the road opposite the car parking lot. You’ll have to cross Smith Dorrien Road, walk over the concrete bridge, and up the gravel road to reach the official start of the trailhead.
Take notice of avalanche zones
The Kananaskis region is prone to avalanches, especially in the months from November to June. Along the Ha Ling Trail you’ll see “Avalanche Zone” signs which are placed in spots where you should not spend any time in, just pass through these quickly. You can also check the conditions on Avalanche Canada.
Related Read: For more ideas of great activities in the area, including hikes around Banff, check out our blog about awesome things to do in Banff National Park!
Other Things to do While You’re in Canmore

If you’re still putting together your Canmore itinerary, here are some of my personal favorite activities across all seasons that I would recommend to anyone!
- Explore the Canmore Caves – One of the best and most popular adventure tours on the outskirts of Canmore is this Canmore Caving adventure tour. You’ll rappel down into the Rat’s Nest Cave system and explore underground through narrow spaces before reaching a clear pool of water with impressive stalactites and stalagmites.
This tour lasts 6 hours, costs $199 CAD, and includes all climbing gear and your own guide so you don’t get lost.
- Go ice skating on a frozen lake – If visiting Canmore in the winter, one of the most epic and non-touristy experiences to have is to go skating on one of the area’s frozen lakes (usually frozen solid by mid-December). A few of my favorites are Gap Lake, Lake Louise, and Vermilion Lakes. If you don’t have your own skates, you can easily rent a pair from Gear Up in town.
- Whitewater Rafting – An iconic Canadian activity that is sure to provide lots of scenic views, thrills, and laughs! After a safety briefing, this whitewater rafting tour will have you splashing through rapids for around 2 hours. It costs $140 CAD and is available in the summer from mid-May until early September.
- Wildlife Safari – Canmore is home to an abundance of wildlife, including black bears, grizzlies, moose, bighorn sheep, foxes, cougars, elk, coyotes, lynx, mountain goats, wolves, and more. Spotting wildlife on your own is often a coinflip so I recommend going on a wildlife tour with an expert who knows where and what to look for along with how to do so in a safe manner.
This private half-day wildlife safari tour is a fantastic option that spends 2 hours on a drive through the Rocky Mountains and a 1.5-hour nature walk to track wildlife. It is a little pricey at $275 per person, but it’s worth it if you’ve been dying to see the native animals!
- Hike to Grassi Lake – The Grassi Lake hike to a naturally emerald-colored lake is one of Canmore’s main attractions. The color is so bright it’s hard to believe it’s real! This 4-kilometer (2.5-mile) long trail only gains 125 meters (410 ft) in elevation and takes most people about 2 hours to complete.
It’s totally doable for most ages and experience levels, so you really have no reason to miss out on the incredible views of Grassi Lake! Just get here early before the parking fills up.
Where to Stay in Canmore


The truth is that there are so many hotels in Canmore that it can be hard to know which one to choose for your stay. Well, luckily for you, Dan and I have stayed in a lot of different hotels in Canmore and have been able to narrow it down to our absolute favorites!
Here are the best places to stay in Canmore including our personal top choice, a budget option, and one for those looking for absolute luxury!
Coast Canmore Hotel & Conference Centre – Our Top Choice

Coast Canmore Hotel & Conference Centre is our absolute favorite place to stay in Canmore. It is affordable without sacrificing any of the comforts you’ll need for a relaxing and enjoyable stay – suitable for almost all travelers and budgets. They have an onsite pool, hot tub, and fitness center along with a delicious bar and restaurant.
This hotel is located right in the heart of downtown Canmore, and just across the road from the Canmore Shops, where you have a selection of restaurants, cafés, and takeaway places.
Oh, and did I mention the views from the hotel windows are breathtaking?
On top of all of that, Coast Canmore Hotel offers a variety of different rooms to choose from, including some that are even pet-friendly (super handy when we are traveling with Rex!). The average cost per night ranges between $200-$400 CAD, and like all hotels in the area, the price really depends on what time of year you’ll be visiting.
You can book this hotel easily on Booking.com. Be sure to book as far in advance as possible because these guys are usually fully booked!
The Malcolm Hotel – $$$
If money isn’t an issue, then The Malcolm Hotel may be the luxurious option you’re looking for. It’s an easy walk to the main part of town or there are shops and restaurants on the same street, although you may never want to leave the property! There’s a rooftop swimming pool and hot tub that are especially amazing at sunset. I also like the games room with giant scrabble and a pool table and the views from the rooms are picture-perfect.
However, rooms here don’t come cheap and are often up to twice the price of most hotels in Canmore. But if luxury is calling your name, check availability and book a room at The Malcolm here.
Canmore Downtown Hostel – $
If you’re a budget backpacker and looking for a hostel, then Canmore Downtown Hostel is your best choice! These guys offer clean and comfortable facilities, dorm beds as well as private rooms, and a social atmosphere perfect for meeting other backpackers, yet reviewers mention it is quiet at nighttime.
The shared lounge room even has incredible mountain views! A dorm bed in a co-ed room averages starts from around $55 CAD. You can book Canmore Downtown Hostel on Booking.com or Hostelworld.com.
If you want more options, you can look through all the hotels in Canmore here!
AIRALO e-SIM Up To 15% Off With Code “DTRAVEL15”
What’s an eSIM?
An eSIM is a digital version of a SIM card. Instead of buying a little plastic chip and swapping it into your phone, you just download it. It connects your phone to a local network in whatever country you’re visiting — no stores, no waiting, and no fiddling with tiny cards.
In simple terms, it’s the easiest way to get data and stay connected while traveling.
We’ve tested a bunch of eSIMs over the years, and after a few frustrating experiences, we’ve found our favorite — Airalo. It’s fast, reliable, and incredibly easy to use. You can set it up in minutes (even my mom managed it solo on her first try!), and the prices are some of the best out there.
💡 Bonus: We’ve got an exclusive 15% discount for our readers. Use the codes:
Thanks for reading!

So, I hope by now I’ve persuaded you that Ha Ling Peak is the best hike in Canmore! If not, then I challenge you to give it a try on a clear day. I think you’ll end up loving it as much as I did (or maybe even more!).
If you found this blog useful, don’t forget to check out our other blogs about Canada. I’ve also included three related blogs below that I think you’ll love.
Our Favorite 33 Activities in Jasper + Places to Eat
ONE Day Icefields Parkway Itinerary: 15 Epic Quick Stops
10 BEST Tours in Canmore, Alberta (that you don’t want to miss!)