If you’re craving adventure in the great outdoors, a Via Ferrata tour in Whistler is an absolute must!
This unique climbing experience takes you through the mountains on a series of fixed cables, ladders, and metal rungs, making it safe and accessible even if you’ve never climbed before. It’s basically a giant jungle gym built into the rock face, with epic alpine views the entire way.
We spent a lot of time in Whistler while living in Vancouver, and this Via Ferrata tour quickly became one of our all-time favorite activities. In this blog, we’ll walk you through exactly what to expect and why this particular tour stands out from the rest!
Check the schedule and book your Via Ferrata tour online here!
- Our Favorite Via Ferrata Tour in Whistler
- When can you do Via Ferrata in Whistler?
- Should you book your Via Ferrata tour in advance?
- What should you wear for Via Ferrata in Whistler?
- Is Via Ferrata in Whistler worth it?
- Other Things to do While You're in Whistler
- Where to Stay in Whistler
- Thanks for reading!
- Why We Book Tours with Viator
- Renting a Car in British Columbia
- AIRALO e-SIM Up To 15% Off With Code "DTRAVEL15"
- What’s an eSIM?
Our Favorite Via Ferrata Tour in Whistler


If you’re ready to book your Via Ferrata tour, look no further than this half-day climbing experience in Whistler. We did this tour last time we visited Whistler and can’t recommend it enough!
The tour starts at the top of the Peak 2 Peak Gondola. This is where we met our guide before hiking for around 40 minutes across a glacier, which really kicked things off on a high note.
After arriving at the course, our climb lasted for about 3 hours. The route covers 4 kilometers (2.5 miles) and 260 meters (850 feet) of elevation gain. It goes all the way to the summit of Whistler Mountain, which is 2,181 meters (7155 feet) above sea level. That’s pretty dang high!
Trust me, when you see the views, you will be SO glad that you put the effort in. Plus, we thought it was a nice reward to take the chairlift back down the mountain after our climb.
What stands out to us about the Via Ferrata in Whistler is that it’s a moderate-level course, so it’s challenging but still suitable for beginners. You’ll be harnessed in, and the guides will make sure you get through the course safely. So if you don’t have any climbing experience but still crave adventure in the mountains, the Via Ferrata in Whistler is just the ticket!

This Via Ferrata tour runs daily during the summer months and is perfect for outdoorsy people 12 years and older. For the tour alone, it costs $229 CAD, which includes a professional guide and safety equipment. However, to get to the starting point of the tour, you must get to the top of the Peak 2 Peak Gondola as well.
Luckily, the tour company makes this easy, and you can message them on Viator after booking to easily purchase your Peak 2 Peak ticket as well. We did this, and it made our day seamless. We didn’t have to worry about lining up and buying tickets on the day of, it was all taken care of already!
Check availability and book your Via Ferrata tour online here!
Related Read: If you’re planning a trip to Whistler, make sure you check out our 3-day Whistler itinerary!
Why We Book Tours with Viator
Viator is a trusted online booking system for tours around the world! We almost always book our tours using Viator for a couple of reasons:
- Free cancellation on most tours – Most of the tours on Viator allow you to cancel and get a full refund up to 24 hours in advance. This is handy in case plans change, or if booking an outdoor activity, the weather forecast is looking grim.
- Reserve now and pay later – You can secure your spot on some of the most popular tours well in advance and not pay until closer to the day of the tour.
- Lowest price guarantee – If you happen to find the same tour at a lower price elsewhere, Viator will refund you the price difference.
- Pay in your chosen currency – Avoid costly international transaction fees by choosing to pay in your home currency.
- Peace of mind – When booking with tour operators you find in person on the street or in small booking offices, you are often promised one thing and given another. This online platform holds tour operators accountable with a written description of inclusions as well as the opportunity for customers to leave reviews.
Check out the Viator website here! Or, for more info, read our detailed review about Viator here.
When can you do Via Ferrata in Whistler?

The Via Ferrata in Whistler is generally open from mid-May until early October. However, this is a weather-dependent activity, so some years it may open later if there’s still too much snow on the mountain.
The best months to do the Via Ferrata are July and August, when you can all but guarantee the snow will be gone and the weather will most likely be balmy, with lots of bluebird days. During the Via Ferrata’s operating months, the tours run twice daily, with departure times at 9 am and 1:30 pm.
You’re likely to get the best conditions in the morning, but it doesn’t make a huge difference, to be honest. We typically go for morning tours just so we have more of the day left to explore. Especially since you have already paid for the Peak 2 Peak gondola ticket, we recommend exploring more of Whistler Mountain afterward and doing the gondola ride between Whistler and Blackcomb Mountain to tick another great Whistler experience off your bucket list!
Check the schedule and book your Via Ferrata tour online here!
Should you book your Via Ferrata tour in advance?

Yes, definitely! The Via Ferrata in Whistler is a really popular thing to do, but there’s a maximum group size of 6, so it books up fast. It also only runs during the warmer months from mid-May to October, which is the busy season in Whistler.
We had our hearts set on doing the climb, so we didn’t want to take the chance that the tour would be sold out when we were planning to be in Whistler. That’s why we reserved our spot on Viator in advance so that we didn’t miss out. Plus, when you book with Viator, you can cancel for a full refund up to 24 hours before the tour starts, which means there’s no risk in case your plans change and you need to cancel!
If you’re ready to book, reserve your Via Ferrata experience here!
Related Read: Looking for more fun activities to do in Whistler? Check out our top ten favorite things to do!
What should you wear for Via Ferrata in Whistler?


We both dressed in comfortable, activewear clothes so that we could easily move around on the Via Ferrata course. For footwear, our trusty hiking boots came in handy! But if you don’t have a pair, you can rent them on the day of the climb.
The weather up in the mountains can change on a dime, so it’s a good idea to pack a waterproof jacket, any extra layers, and some gloves because it can be cold at the top. We wore backpacks while climbing the Via Ferrata, so we could keep warmer clothes in there just in case we needed them.
Sunglasses are also a must, and make sure to bring some sunscreen along. Even though we felt a bit like we were packing for the beach and not the mountains, the sun reflects off the snow up there, and it gets really bright!
If you overpack (like me!), just talk to your guide when you arrive at the office in the meeting area before the climb. They were super kind and totally willing to store anything we didn’t want to bring with us.
Related Read: If you’re craving more adventure in Whistler, check out these awesome ATV adventures!
Is Via Ferrata in Whistler worth it?

Yes, 100%. We loved it!
Our climb was absolutely awesome, and the views were some of the best that we’ve seen in Whistler. The experience was a little scary, but this Via Ferrata is actually very modest compared to some of the ones in Europe, which can be downright terrifying! It makes climbing so much more accessible, and we had that huge sense of achievement (and bragging rights!) to say we climbed to the top of the mountain.
Learn more about the best Via Ferrata tour in Whistler and secure your spot here!
Related Read: If climbing Whistler’s Via Ferrata has you hooked on alpine thrills, don’t miss our best things to do in Whistler in winter guide here for even more cold-season adventures.
Other Things to do While You’re in Whistler


While you’re in Whistler, there are tons of great activities to check out. Below, I have listed some of my absolute favorite things to do in Whistler to add to your itinerary!
- Go ziplining – For epic views of rivers, glaciers, lakes, and mountains, why not soar above them? Whistler has some incredible ziplining tours, but our favorite is the Sasquatch® Zipline! It’s the longest zipline in Canada and the craziest one we’ve been on (in a good way!). You’ll zip 7,000 feet (2,133 meters) down the face of Blackcomb Mountain – talk about an unforgettable experience!
- Explore Whistler – If it’s your first time visiting Whistler, there is no better way to explore than on this private 3-hour sightseeing tour. Our expert guide took us to all the top spots, plus some hidden gems we never would have found on our own!
- Fly in a seaplane – If you’ve never been on a seaplane before, this is your chance! This seaplane flight gives you jaw-dropping views over Whistler and the surrounding mountains—and taking off and landing on the water is such a fun, unique experience. Definitely a bucket-list-worthy addition to your Whistler itinerary!
- Wine & dine – Whistler is packed with world-class restaurants, making it a dream destination for foodies. The only problem? There are too many great places to choose from! That’s why we loved this progressive dinner tour—it takes all the guesswork out by guiding you to four of Whistler’s top restaurants, with a delicious course served at each.
- Go bike riding – Biking is one of the best ways to explore Whistler, with trails crisscrossing the entire area and plenty of scenic spots to discover. You can rent a bike and explore at your own pace, or join this guided e-bike tour that takes you along a beautiful route to three different lakes—perfect for covering more ground without breaking a sweat!
Where to Stay in Whistler

If you’re traveling to Whistler, there are lots of different places to stay. I always recommend staying right in Whistler Village so you’re close to all the best restaurants and shops. After plenty of visits, I’ve narrowed down the best hotels for every budget to help you find the ideal base for your trip.
Just a heads up, Whistler books up fast, especially in peak seasons. I highly recommend reserving your hotel early to lock in the best rates and availability. With that said, here are my top picks!
Luxury – $$$
For a luxury hotel in the heart of Whistler, the Whistler Village Suites is my top choice. For Whistler, it’s still a great value hotel and has a stunning indoor/outdoor swimming pool, plus a bar, several hot tubs, and a well-equipped fitness center. As for the rooms, they’re so comfortable that you might not want to leave the property. Some of the suites even have balconies with mountain views!
Prices range from $300 to $800+ CAD, depending on season and room size. You can check availability and reserve your stay on Booking.com.
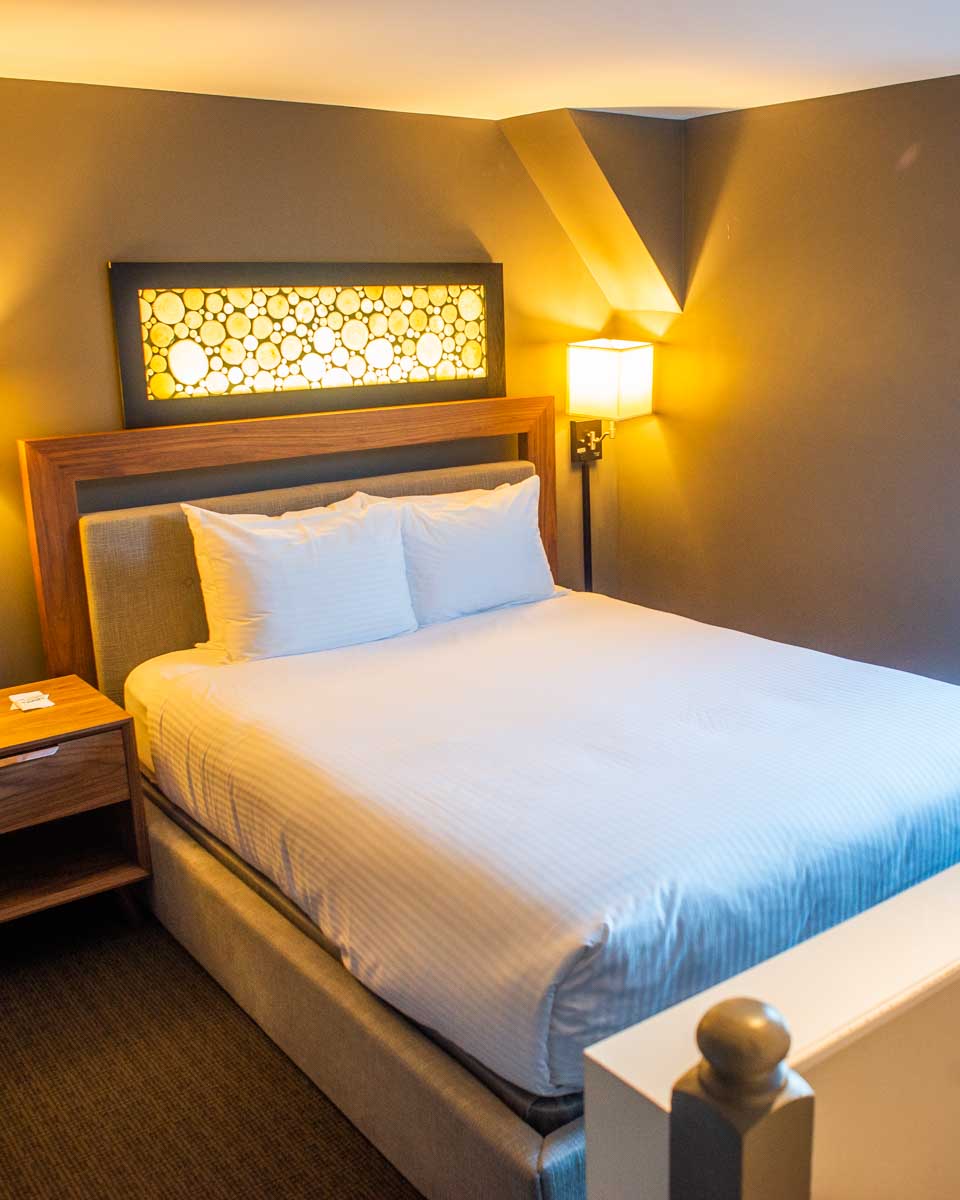
Mid-range – $$
Our go-to hotel in Whistler is the Adara Hotel. For us, it is the perfect mix of luxury and affordability with everything you need for a comfortable stay. They offer underground parking and are only a one-minute walk from the Whistler Stroll, so you can park your car and leave it while you explore Whistler Village.
They also have a beautiful outdoor pool and hot tub offering mountain views – perfect for relaxing in the evening. The loft rooms are our favorite, and most also offer mountain views from the upstairs patio.
Rooms range from $150 to $300+ CAD per night. Book Adara Hotel on Booking.com here.
Budget – $
Pangea Pod Hotel is a stylish, budget-friendly stay in the heart of Whistler Village, perfect for travellers who want to be close to the action without the high price tag. This unique pod-style hotel offers sleek, modern sleeping spaces with privacy screens and secure storage, along with inviting shared areas like a rooftop bar, café, and guest lounge. It’s ideal for solo travellers or couples who plan to spend their days exploring and their nights crashing somewhere simple and comfortable.
Private pods with shared bathrooms start around $100 CAD per night, and you can check availability on Booking.com.
Check out all of Whistler’s accommodation options here!
Renting a Car in British Columbia

If you’re arriving in British Columbia via plane, then I can’t recommend getting a rental car enough. British Columbia is a large province, and traveling between the best places to visit in BC requires transport. Although you can use public transport on some occasions, this means your trip will not only require more time but more planning.
Car rental in Canada isn’t relatively cheap, but it’s not that expensive either, especially if you get a budget car. The cheapest car with a pick-up and drop-off in different locations is around $100 CAD per day. The price does vary though, depending on the time of year. For car rentals, I use the website Discover Cars. It’s a search engine with lots of deals with good customer service. In fact, I’ve used Discover Cars all over the world, including in Chile, New Zealand, and Australia. Read my honest review of Discover Cars here for more details!
Another popular option is to rent a campervan or motorhome (only for the brave in winter). Using Motorhome Republic, you can search hundreds of deals across multiple companies to pick a great vehicle and the cheapest price. Having a motorhome is a stunning way to see Canada and you can often camp for free or very cheap in the most beautiful places imaginable! Read my tips on using Motorhome Republic here before you book!
And if you’re planning to visit the Canadian Rockies during your trip, we highly recommend Smile Campervans. Based in Calgary, this local company provides compact campervans fully equipped with everything you need for a comfortable and affordable road trip adventure!
In fact, Smile Campervans has actually given us a special discount code for our readers! Use the code DESTINATIONLESSTRAVEL at checkout to get 5% off your campervan rental! Click here to browse availability, prices, and book with our discount code!
AIRALO e-SIM Up To 15% Off With Code “DTRAVEL15”
What’s an eSIM?
An eSIM is a digital version of a SIM card. Instead of buying a little plastic chip and swapping it into your phone, you just download it. It connects your phone to a local network in whatever country you’re visiting — no stores, no waiting, and no fiddling with tiny cards.
In simple terms, it’s the easiest way to get data and stay connected while traveling.
We’ve tested a bunch of eSIMs over the years, and after a few frustrating experiences, we’ve found our favorite — Airalo. It’s fast, reliable, and incredibly easy to use. You can set it up in minutes (even my mom managed it solo on her first try!), and the prices are some of the best out there.
💡 Bonus: We’ve got an exclusive 15% discount for our readers. Use the codes:
Thanks for reading!

The Via Ferrata in Whistler is such a fun outdoor adventure, and we thought the views were definitely worth the effort! Hopefully, our guide has answered all your questions and given you the push you need to book this great tour!
If you’re still debating a visit to Whistler, check out our review on if visiting Whistler is worth it, and check out one of the related guides below:
22 BEST Stops on the Drive from Whistler to Calgary
12 Things to KNOW Before Driving the Sea to Sky Highway
How to Get from Vancouver to Whistler +20 EPIC Road Trip Stops